
Isn't this a great layout! I am using Rev Up the Fun for my project for the Summer Collection 2013, so I went ahead and used it for this first Saturday Challenge as well.
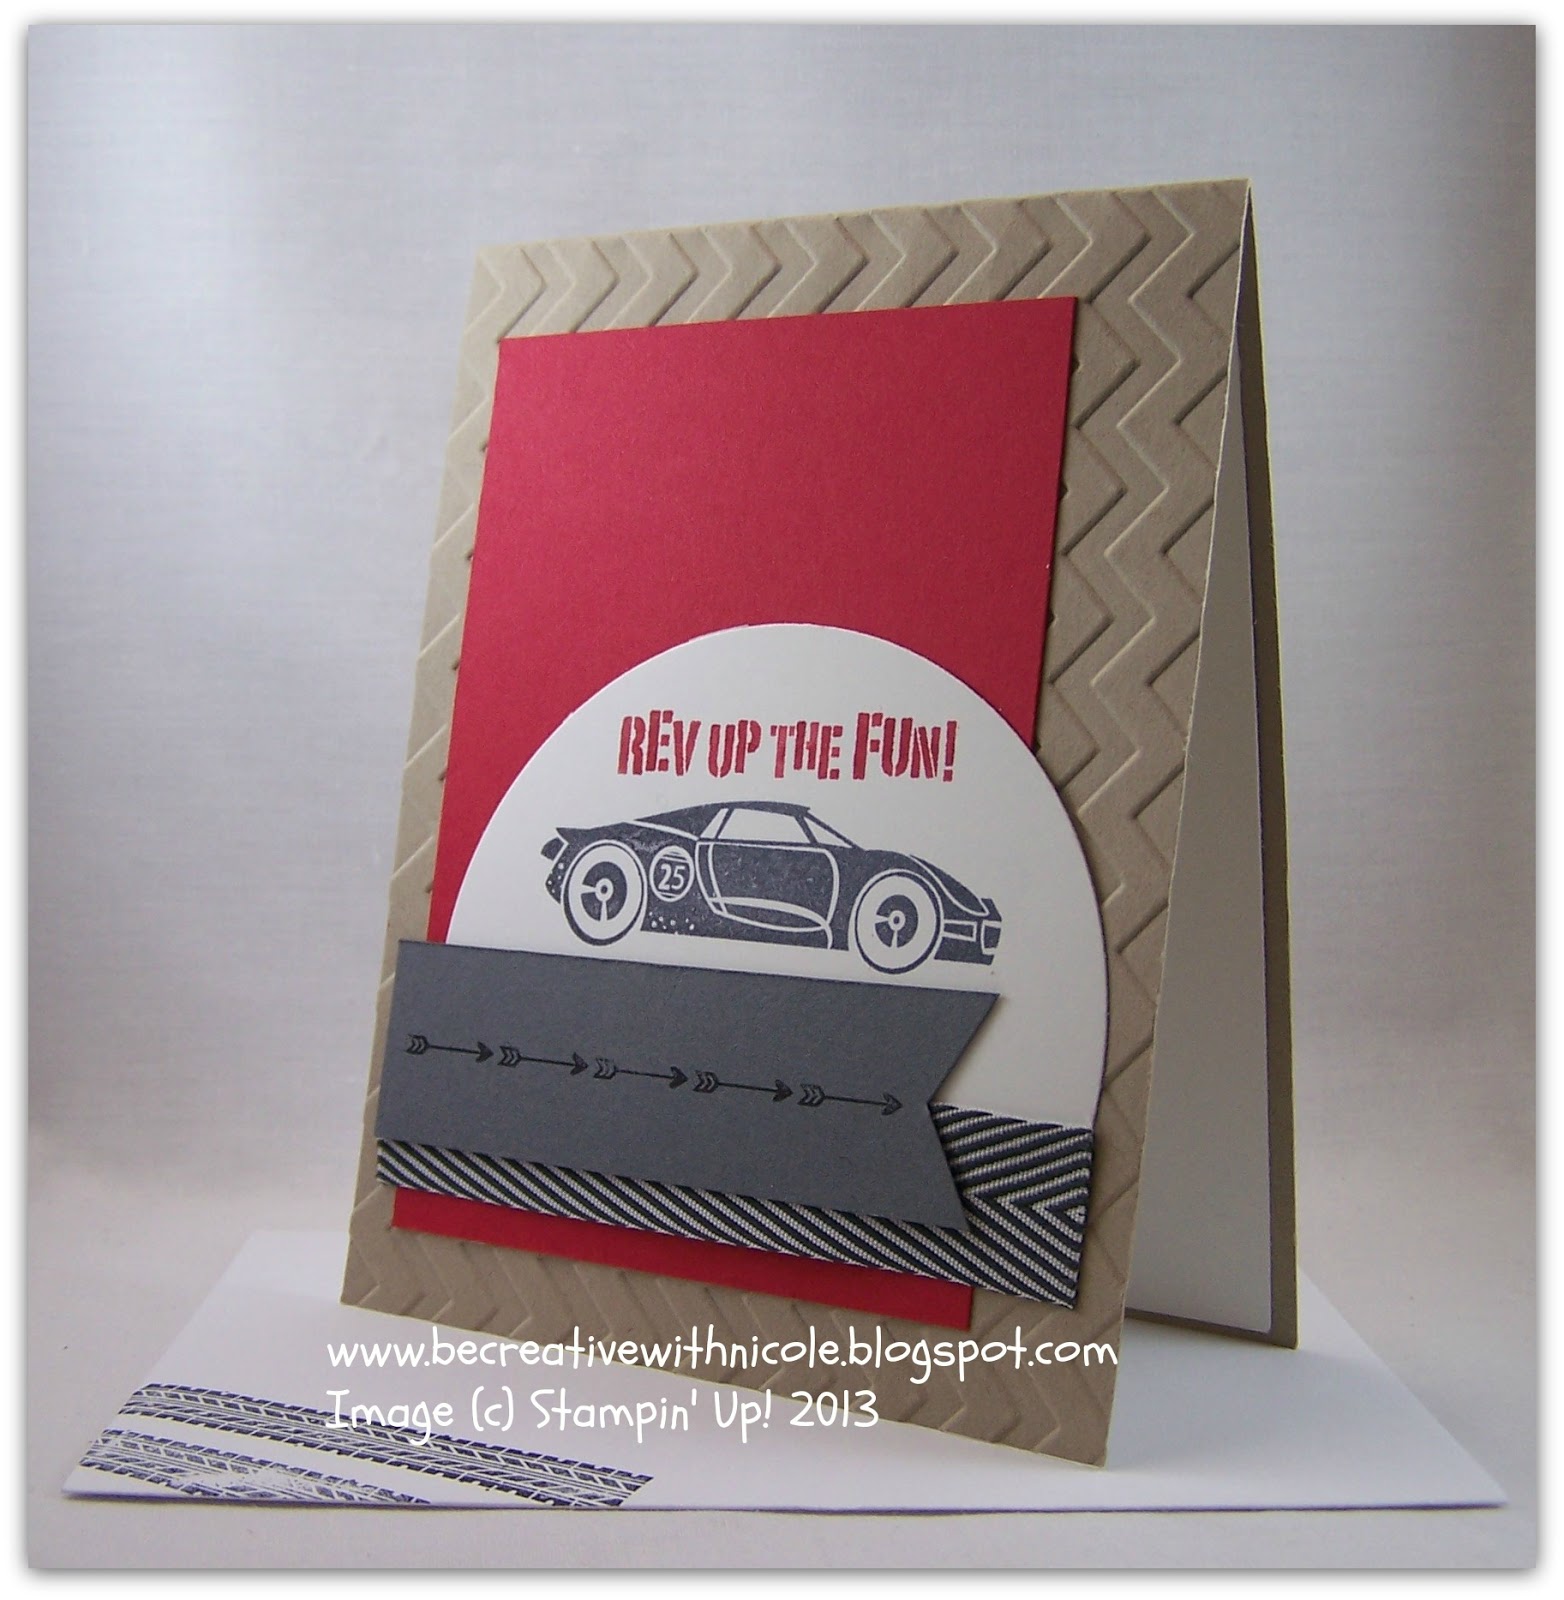
I must say that this set is sooo much fun to work with! When I saw the sketch for this week's challenge, I saw this card right away. So, let's get on with the details. My colors this time are Real Red, Crumb Cake, Basic Black Whisper White and Basic Gray. The Crumb Cake card base is embossed with the Chevron EF which goes perfect with this stamp set. The Real Red layer goes on next, it makes the car stamped on Whisper White really stand out. The car was stamped with Basic Gray, the greeting was done in Real Red. Instead of using a marker to isolate the top of the greeting, I placed a piece of tape over the Happy Birthday and inked up the stamp. Before stamping I removed the tape and was able to cleanly stamp the top part of the greeting. I added in Black Chevron ribbon and Basic Gray CS as my next two layers. The basic gray was stamped with arrows from the new Photopolymer set called Show and Tell 1. This card came together super quick and is great masculine card to have on hand.
I hope you will join me for the Create Saturday Challenge. You can go to Create with Connie and Mary for all the details and to see the other cards made by the Design Team. It's not too late to sign up for the Summer Collection 2013. All the details about the collection are given on the blog. I hope you will sign up, the Designers have come up with incredible projects for you!
Thanks so much for visiting!
If it doesn't move...stamp it!
Nicole Tugrul
Independent Stampin' Up! Demonstrator
SHOP 24/7 on my Demonstrator Website
Cards and Retired Stamps for Sale


