Showing posts with label Shooting Star. Show all posts

Friday, December 16, 2016

All that Glitters

Welcome to another Create with Connie and Mary Saturday Blog Hop!  This week our theme is ALL THAT GLITTERS.


I went with a very unusual card for this one, I wanted to be totally different!  Check it out........

shooting-star-christmas-becreativewithnicole-com

Not your usual Christmas card, right??  Well, I was in the mood to make a movement card so I thought about how I could incorporate the slider card dies into my card.  PEACE ON EARTH was the answer!  The earth in the SHOOTING STAR fit the bill.

shooting-star-christmas

The card base was done in black so the silver foil paper would really stand out.  I added in silver glimmer paper and silver embossing as well.  There is even shimmer on the earth that was added with the clear WINK OF STELLA.

shooting-star-christmas-becreativewithnicole-com

I hope you've enjoyed this idea, making an unusual Christmas card was so much fun!

My supply list is below so you can give this a try!

SUPPLIES:

STAMPS:  Shooting Star, Labeler Alphabet

INKS:  Versa Mark, Black Archival

PAPER:  Whisper White, Basic Black, Silver Foil, Silver Glimmer


ACCESSORIES:   Sliding Stars Framelit Dies, Christmas Greetings Thinlits, Layering Circles Framelits, Watercolor Pencils, Versa Marker, Wink of Stella, Embossing Buddy, Silver Embossing Powder, Heat tool,  Stampin’ Trimmer, Paper Snips, Bone Folder, Foam Adhesive Strips,  Dimensionals, Fine tip Glue Pen, 2 washers or pennies

Have you checked out the December Mini Session yet??  We brought you ALL NEW ideas with products from the upcoming Occasions Catalog!  It's worth checking out.....find out more at CREATE WITH CONNIE AND MARY!

deccollage

Now, let’s check out what the rest of the Design Team has for us today. Click Previous to visit the very talented Mary Brown and Next to see the very talented Debbie Henderson.


Thanks for hopping with us, we love inspiring you!  Happy Stamping!


Save

Save

Save

Sunday, August 14, 2016

Galaxy Watercolor Technique

Thank you for all the great comments and e-mails about the Galaxy Watercolor cards that I shared yesterday!  I am so glad you all loved this fun technique as much as I do!

Shooting Star becreativewithnicole.com

Here's the two cards I shared again with this awesome technique.  I have a few pictures to show you how I did this technique with Stampin' Up! products.  I want to give a shout out to Wendy Cranford who shared this idea on her blog.

Let's get started!  You will need the following:
Product List


Galaxy watercolor 1

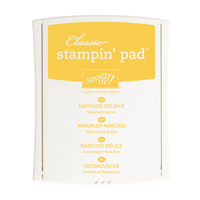
Lay out your watercolor paper and make sure your aqua painter is full of water, you will need it plus more!  On the left side of the watercolor paper you can see the first layer of color that I made.  Take your ink pads, one by one and add splotches of color all over the paper.  Try not to have the colors bleed too much, you don't want to muddy your nice bright colors.  You will cover the entire page with color splotches of Melon Mambo, Daffodil Delight, Bermuda Bay, Pacific Point and Rich Razzleberry.  With each of the ink pads, transfer color to the lid and add color to the watercolor paper with the aqua painter.

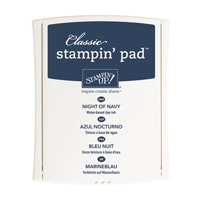
Once all of the colors are down on the paper, you will start in with the Night of Navy ink OVER TOP.  You want to add a drop or two of re inker to the lid of the Night of Navy ink pad, you will need lots of color.  I added quite a bit of water to the lid as well so the ink will flow over the watercolor paper.  NOTE: Before you add this layer of Night of Navy, make sure your paper is dried from the first layer of color.

Galaxy Watercolor 2

Add Night of Navy ink with the aqua painter over your splotches of color leaving some areas darker than others.  I actually added TWO layers of navy, letting the first layer of color dry well before adding the second.  That's how I got the nice dark galaxy look that still has a little color showing through.

Once your paper is dry, you will be at the last step.  Get a little bit of Whisper White craft ink in the lid of you ink pad.  Add a little water and use a regular paint brush to splatter white spots over the paper.  This completes the galaxy look.

Galaxy Watercolor 3

Now you are ready to cut up you paper into the pieces you will need for you cards.  I hope you'll give this a try, it is a really cool technique!  You can see the video that I watched by Wendy Cranford.  Just use Night of Navy ink for the one step that she used black watercolor ink.  Please let me know if you have any questions and I would love to see what you create!

Shooting Star becreativewithnicole.com

Did you know that I did SHOOTING STAR for my card set in the June Mini Session from Create with Connie and Mary??  Yep, 4 cards with this awesome set.  AND, guess what’s already been released that you should check out……….the AUGUST MINI SESSION!  We have 5FULL TUTORIALS for you with new stamps from the Annual Catalog PLUS a BONUS card set with the upcoming holiday set STAR OF LIGHT.

CCMAugMini

To find out more information and to subscribe, please visit CREATE WITH CONNIE AND MARY.  I hope you’ll join us!

1BLOG SIGGY

CATALOG CLICK TO VIEW

CLICK HERE to SHOP anytime and earn FREE STAMPS


SHOP the CLEARANCE RACK and WEEKLY DEALS


CLICK HERE to shop TUTORIALS FOR SALE


Subscribe to My Paper Pumpkin


Print Friendly and PDF

Follow my blog with Bloglovin

Friday, August 12, 2016

Swing on a Star

Welcome to another Create with Connie and Mary Saturday Blog Hop!  This week we have a really fun theme, SWING ON A STAR.


All of our projects will have something to do with stars.  I actually have 2 cards to share today featuring the SHOOTING STAR BUNDLE!  I has so much fun with this technique that I had to make more than one!

Shooting Star becreativewithnicole.com

Now you can see why one wasn't enough!  I has way too much fun with this technique that I learned from Wendy Cranford.  I had to change up the last bit of the process a little to use only Stampin' Up! and it worked beautifully!

Shooting Star Galaxy Technique

This first card features the slider die cut where the star can shoot across the sky.  The galaxy watercolor technique makes the background so realistic!  I used watercolor paper (can you believe this was a pure white piece of paper!) and added LOTS of color!  The star was also done on watercolor paper so the colors would blend and look as beautiful as the galaxy background.

Shooting Star Galaxy Technique Spinner

Knowing full well that one card would not be enough, I made a WHOLE PAGE of this background!  Yep I just did a whole page that I could cut up into the sizes I needed.  A much more efficient way to go about making this type of card.  For this second card, I went with the spinner die cut and sent the world round and round!

Shooting Star becreativewithnicole.com


So now I would love to know what you think!  Do you love this technique as much as I do??  Would you like a tutorial??  Please leave me a comment with your opinion, I'd love to know what you think :)  ****I added a tutorial, thank you for all the comments!  Click HERE.

Did you know that I did SHOOTING STAR for my card set in the June Mini Session from Create with Connie and Mary??  Yep, 4 cards with this awesome set.  AND, guess what's already been released that you should check out..........the AUGUST MINI SESSION!  We have 5FULL TUTORIALS for you with new stamps from the Annual Catalog PLUS a BONUS card set with the upcoming holiday set STAR OF LIGHT.

CCMAugMini

To find out more information and to subscribe, please visit CREATE WITH CONNIE AND MARY.  I hope you'll join us!

SUPPLIES:

STAMPS:   Shooting Star, Places You'll Go

INKS:  Melon Mambo, Daffodil Delight, Bermuda Bay, Pacific Point, Rich Razzleberry, Night of Navy, White Craft, Versa Mark

PAPER: Watercolor, Night of Navy


ACCESSORIES:  Sliding Star Framelits, 1" Circle Punch, Aqua Painter, Black Embossing Powder, Heat Tool, Embossing Buddy, Paper Snips, Stampin’ Trimmer, Bone Folder, SNAIL, Foam Adhesive Strips, dimensionals

Next, let’s check out what the rest of the Design Team has for us today. Click Previous to visit the very talented Mary Brown and Next to see the very talented Debbie Henderson.


Thanks for hopping with us, we love inspiring you!  Happy Stamping!


Print Friendly and PDF

Follow my blog with Bloglovin

Friday, June 24, 2016

Sweet Sugarplum

Welcome to another Create with Connie and Mary Saturday Blog Hop!  This month we are featuring the NEW IN COLORS!!  This week is SWEET SUGARPLUM and it's as sweet as it's name!


This card was actually created without today's color and blog hop in mind.  I was experimenting with the SHOOTING STAR BUNDLE and the gorgeous new BLOOMS AND BLISS DSP and this card pretty much made itself!  I was going to post it one day last week then I realized it would be better to save it for the SWEET SUGARPLUM blog hop.

Shooting Star Bundle becreativewithnicole.com

Is this just too sweet or what!!!  I added a bit of RICH RAZZLEBERRY as an accent color and love the results!

Shooting Star Bundle

Up close you can see the designer paper underneath the penny slider that was created with the SLIDING STAR FRAMELITS.  It's full of flowers which is just perfect for the honeybee from SHOOTING STAR.  I also gave the bee a couple of Rich Razzleberry SWIRLY SCRIBBLES FRAMELIT flowers.  The card is really super simple and yet wonderful interactive!

Shooting Star Bundle becreativewithnicole.com

If you haven't taken a look at the SHOOTING STAR BUNDLE, you so should!! This bundle is just full of possibilities, especially using the slider die cuts for all sorts of other stamp sets!  I actually did this month's JUNE MINI SESSION card set with this bundle, you can find more details HERE if you want to know more!!

Alright, time for the good stuff…. the supply list so you can make your own interactive SHOOTING STAR slider card.

SUPPLIES:

STAMPS:   Shooting Star

INKS: Archival Black

MARKERS:  Daffodil Delight, Smokey Slate

PAPER: Whisper White, Sweet Sugarplum, Rich Razzleberyy, Pear PizzazBlooms and Bliss DSP


ACCESSORIES:  Sliding Star Framelits, Swirly Scribbles Framelits, Paper Snips, Stampin’ Trimmer, bone folder, SNAIL, Fine Tip Glue Pen, dimensionals, pennies

Next, let’s check out what the rest of the Design Team has for us today. Click Previous to visit the very talented Mary Brown and Next to see the very talented Melissa at RubberFUNatics.


Thanks for hopping with us, we love inspiring you!  Happy Stamping!


Print Friendly and PDF

Follow my blog with Bloglovin